xx


Libra Wirefree Extender & 100m Chime

Instructions for Model No. D357


Pack Contents
Extender
Door Chime
Door Chime wall hanging bracket (incl screws and wall plugs for mounting)
Screws and wall plugs for mounting the Extender
Extra wire for connecting the Extender

You will need
1 x 6LR61(PP3) alkaline battery for Extender
2 x LR6(AA) alkaline batteries for Door Chime
We recommend that only longlife alkaline batteries are used. This product will not work with NiCd rechargeable batteries
A small flathead screwdriver
A Philips crosshead screwdriver

Installation
Extender
Please note : The extender is not suitable for outdoor installation. We recommend you read the Vital Information about system codes before installation.
Positioning the Extender or Door Chime on or near metal structures or reinforced PVCµ doors or door frames may reduce the transmission range.

Open the Extender cover using a flathead screwdriver, Diagram 1,and remove the screws. Decide on the location of the Extender and on the length of cable you will require. Feed the cable through the cable inlet (A in Diagram 4). Attach the Extender to the wall using the screws provided, Diagram 8. Then follow one of the
two installation options below.
Option 1. Installing the Extender for use with an existing Wired Bell Push and Door Chime.
Disconnect the power supply to your existing Chime by isolating the mains supply (if transformer-powered) or removing the batteries. Connect the Extender terminals in either of the 3 positions X ,Y or Z as shown in Diagram 2, using terminals 0 and 2.
Option 2. Installing the Extender for use with a traditional wired Bell Push, when no wired Chime exists (Diagram 3).
If you are using the extender to allow you to have a traditional decorative bell push on your door, connect the Extender to your traditional wired Bell Push using terminals 0 and 1. See Diagram 3.
To complete your installation, fit the 6LR61(PP3) battery as shown in Diagram 4 and replace the Extender cover securely.
Please note : The Extender always requires a 6LR61(PP3) battery. Always check that the wires are connected to the correct terminals before reconnecting the power or
replacing the Chime batteries.


Door-Chime
Remove the battery compartment cover and insert the two LR6(AA) alkaline batteries as shown in Diagram 5.
When these batteries need replacing, the Battery Low Warning Light (B in Diagram 6) will flash every 5 seconds.
The Door Chime can be free standing or wall mounted using the wall bracket provided.
If wall mounting is preferred, screw the bracket to the wall, Diagram 7. The Door Chime hooks onto the wall bracket as illustrated.
There is an external adapter socket (C in Diagram 6) which allows you to power the Door Chime receiver from a 220-240V mains socket using the Friedland Libra plug-in mains adapter which can be purchased separately (D254).

Tune Selection
Your Extender can be set up to make the Door Chime play a 2 note or 4 note sequence.
The Tune Selector in the Extender (D in Diagram 8) is factory set to position 1 making the Door Chime play the standard 2 note sequence. If you would prefer the 4 note sequence just move Tune Selector to position 2.
You can change the note sequence at any time by using the procedure above.

Volume Control
The Volume Control (E in Diagram 6) enables you to adjust the volume of your
Door Chime at any time or turn it off completely. As shown the settings are:
2. High
1. Low
0. Mute


Caradon Friedland guarantees this product for
3 years from the of purchase.
This does not effect your statuory rights
If you require further information
about Libra products,
call the Friedland helpline on
0161 432 0277 ext 888.

Trouble shooting

Problem Possible Cause Solution
Chime not
sounding
Batteries may not be inserted
correctly
Check all batteries have been
inserted correctly
 Chime may be positioned out
of range of the Extender
Move your Chime closer to the
Extender
 A metallic object may be
blocking the signal from the
Extender
Experiment with the location of your
Chime to see if you can position it in
a more suitable place
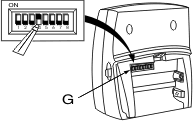
 The battery in the Extender
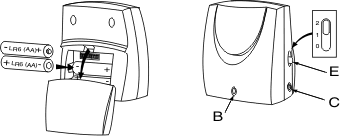
may need replacing
Press the Bell Push. If Confidence
Light (D) Diagram 1 does not
illuminate, replace the Extender battery
 Your Extender and Chime may
have different system codes
Check the system codes in both your
Chime and Extender
 Your volume control may be
set to the mute setting
Set volume control to position 1 or 2
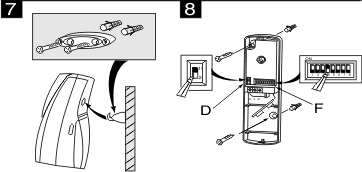
The Extender may not be
wired correctly
Press the Bell Push. If Confidence Light
(D Diagram 1),does not illuminate,
check the extender wiring. If you are
extending an existing datebattery powered
Chime, swap the two wires over at the
transmitter terminals
False
activation
of the Chime
Another of your own or a
neighbour's wirefree product
may be using the same code
Change the system codes in both your
Extender and Chime
   
1
  
5
9